
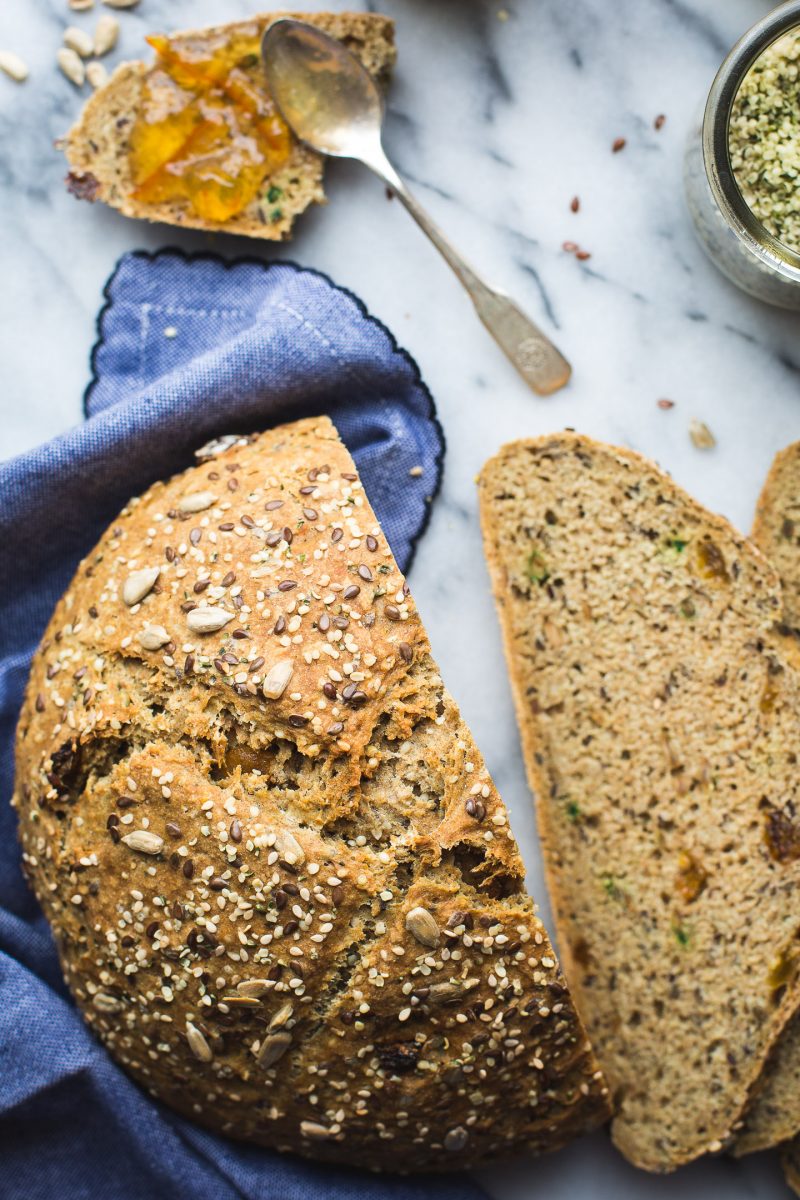
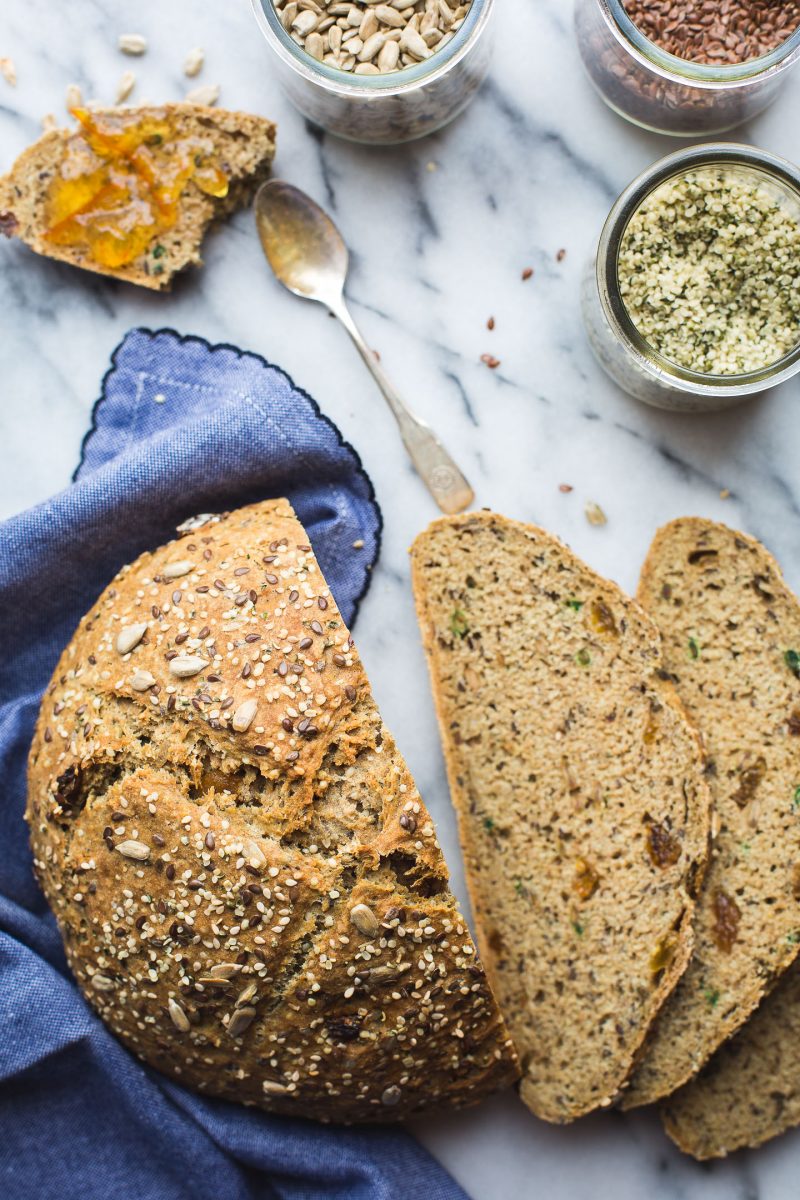
This simple Seeded Soda Bread recipe yields a homey, delicious loaf speckled with nutty seeds and just a touch of golden raisins. So perfect with a bit of marmalade or just on its own. Plus, this bread has a bit of an unusual surprise…
Vegan![]()
Baking bread has become almost routine in my kitchen these past several months. I can barely go three or four days without baking some sort of yeasted bread. I’ve been working on perfecting my sourdough loaf and hope to share that with you soon, but some days, the need to bake is stronger than my ambition.

That’s where soda breads shine. Their simple ingredients whisk up quickly without any kneading and bake without much fuss.
In about an hour, you’ve got a hearty, delicious loaf, ready to be served with a meal or on its own. My favorite way to eat this is toasted with a slather of marmalade. I’m hungry just thinking about it!
Authentic Irish Soda Bread?
Authentic Irish Soda Bread is simply flour, baking soda, salt and buttermilk. The addition of sugar, currants, raisins and seeds happened somewhere along the way, but is traditionally considered more of a tea cake. Authenticity cannot be claimed here, but tasty can be!

This recipe, inspired by Nigel Slater’s Seeded Soda Bread, does incorporate lots of nutty seeds, but I’ve tried to find a balance between his barely sweetened loaf and what is probably the Americanized version with too much sugar and lots of raisins. I love how this recipe turned out!
You’ll find this loaf to be slightly sweet, with just a small scattering of golden raisins and hearty with a nice mix of flax, hemp, sesame and sunflower seeds. The crust is really lovely. Baking in a dutch oven creates a thin, crisp crust that I know you’ll love.
What’s the surprise?
So, you’ll actually find a very befitting surprise once you’ve sliced this loaf! I’m calling it a St. Patrick’s Day surprise! The chlorophyll in the sunflower seeds will react with the baking soda in the bread to create little green flecks throughout. As the loaf sits, the green will become even more prominent. This reaction is completely harmless and I think, it’s just really fun!
I’d love to hear from you if you get a chance to bake this! Let me know how you like it and if you got a St. Patrick’s Day surprise, too!

Seeded Soda Bread

Ingredients
- 1 2/3 cup (225g) whole wheat flour
- 1 3/4 cup (225g) all purpose flour
- 1 1/2 teaspoons baking soda
- 1/2 teaspoon sea salt
- 2 tablespoons granulated sugar
- 2 tablespoons whole brown flaxseeds (linseeds)
- 2 tablespoons hulled hempseed hearts
- 2 tablespoons sesame seeds
- 2 tablespoons shelled, raw sunflower seeds
- 1/4 cup golden raisins
- 1 1/2 cups (350ml) plant-based milk I use unsweetened almond milk
- 1 teaspoon apple cider vinegar
- Additional milk and seeds for topping
Instructions
- Place a cast iron dutch oven or a heavy pot in your oven with its lid. If the lid is not heatproof, protect the knob with aluminum foil. Preheat your oven with the pot in it to 425 degrees F.
- In a medium mixing bowl, whisk together the flours, baking soda, salt and sugar. Add the seeds and whisk again to combine.
- In a measuring cup, add the cider vinegar to the milk. Give it a stir and add the milk mixture to the dry ingredients. Using a rubber spatula, mix to combine just until there are no dry, floury spots.
- Tear off a piece of parchment about 12 inches wide. Dump the dough onto the parchment. Using heavily floured hands, form the dough into a boule about 7 inches wide, re-flouring your hands, as needed. Brush the top of the loaf with just a bit of milk and sprinkle with a few pinches each of your seeds. With a sharp knife, cut an X across the top.
- Once preheated, carefully remove the pot from the oven and close the oven door. Carefully remove the lid and using the parchment, move the loaf into the center of the pot. Replace the lid (keep those pot holders on!) and place the pot back into the oven.
- Bake, covered, for 20 minutes. Remove the lid and continue baking for an additional 20 to 25 minutes, until golden on top.
- Remove the pot from the oven and lift the loaf out using the edges of the parchment. Cool on a wire rack before slicing.
- I like to keep my bread in a brown paper bag on the kitchen counter. It keeps for a few days.
Notes
If you love this Seeded Soda Bread, you’ll love…
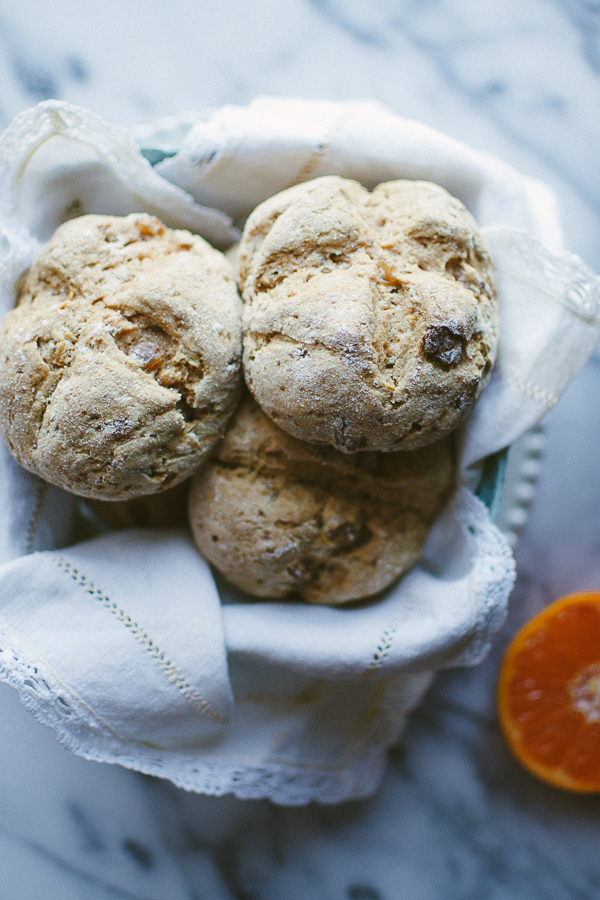
Mini Irish Soda Breads

Cranberry Orange Soda Bread
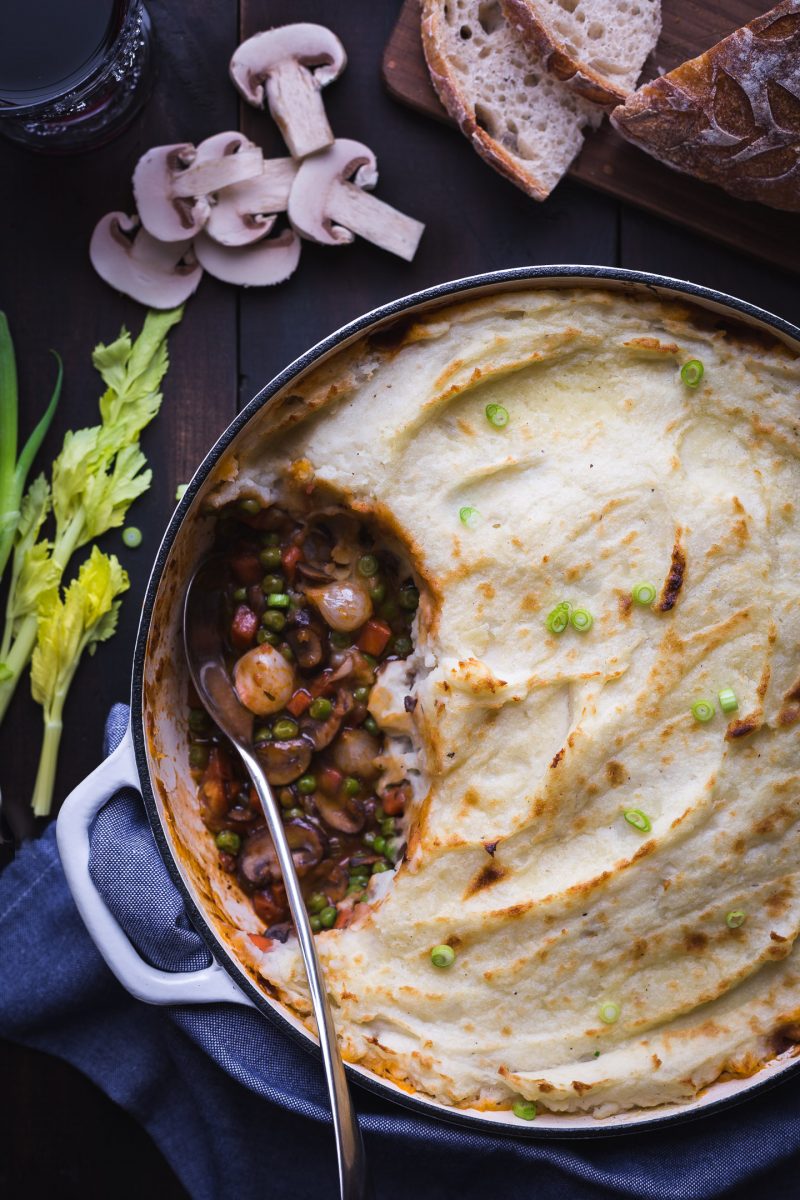
Vegetable Shepherd’s Pie
I LOVE SEEING PHOTOS OF RECIPES THAT YOU’VE MADE!
Before you take a bite, snap a photo with your phone, follow me on INSTAGRAM and tag it with #TASTELOVEANDNOURISH
Just curious about your addition of apple cider vinegar because I haven’t seen it before with soda bread. What does it do for the bread? Thanks.
Great question, Maureen! Baking soda needs an acid to help it bubble up and that’s the job of the apple cider vinegar.
I was intrigued by the addition of golden raisins in this recipe, but I don’t see them in the ingredient list. Help please! :)
Patty! Thanks a million for catching that! Just updated the recipe now. :)
Thanks! I look forward to trying out this recipe and many others on your site!
The super seedy bread from Whole Foods is my favorite, so I know I would also love this! So easy to make at home. Thanks for the recipe!
Ooooh…super seedy sounds amazing! Clearly, I’m into seedy bread! Thanks so much, Joanne!
i love the sound of this recipe as i find others tend to be too sweet for me. Alas, I don’t have a Dutch oven so I wondered if you have any thoughts about baking it on a cookie sheet? It looks as though it would be sturdy enough for that. Thanks.
I’m with you on that, Jacquie! I do love a bit of sweetness in my soda bread…but not too much! If you have a heavy pot, that could also work. I haven’t tested this on a cookie sheet, but truly, I do think it would work. If you get the chance to try that, I’d love to hear about your results! Thanks so much! :)
I have been making sourdough and I don’t have a dutch oven. You can cook it many ways without one. The point of the dutch oven is to create steam at the beginning of the bake. I do this by putting a domed lid over my dough for the first part of the bake, then taking it off. You can do that on a cookie sheet. Hope that helps!
Thanks so much for sharing that tip, Sandy!